Tools you'll need
- Tape measure
- Pencil
- Speed square
- Miter saw or circular saw - For the angled brace cuts
- Drill / driver
- Clamps - 4 or more
- Sandpaper - 120, 180, and 220 grit
- Pocket-hole jig - Optional
- Safety glasses
Materials
- Pine boards - The top panel, both side panels, and both cross-brace pieces all come from the same board size — a 1x6, 1x8, or 1x10 depending on the nightstand size you choose
- Wood glue
- ~8 2" #8 wood screws - The top-to-side joints
- ~8 1 1/4" #8 wood screws - The cross braces
Skip the math - the Fixie iOS app generates a per-project cut list for the exact dimensions you pick, with kerf accounted for and one-tap sourcing for the lumber.
Step by step
Gather your materials and tools
Every piece of this nightstand — the top, both sides, and both X-brace pieces — comes from the same board width, so pick your board size (1x6, 1x8, or 1x10) based on how deep you want the finished nightstand.
Review your cut list
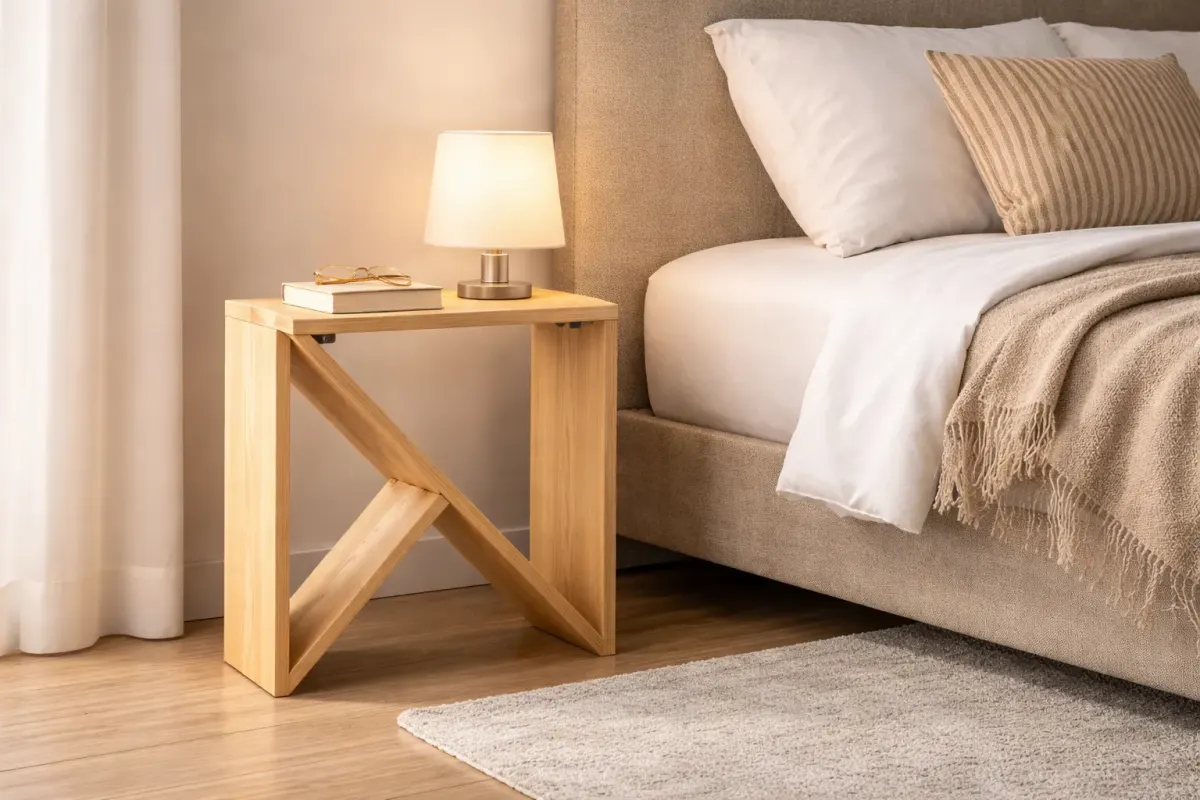
You're cutting five pieces total: one top panel, two side panels, and two cross braces — one long diagonal, one short diagonal that meets it at the center.
Cut all your lumber
The top and sides are simple square crosscuts. The long brace gets a single 45° miter at each end; the short brace gets one 45° miter where it meets a leg and a square butt cut at the center, where it meets the long brace. Label every piece as you cut it.
Sand every piece
Work through 120, then 180, then 220 grit, sanding with the grain, and lightly ease the mitered ends without rounding over the angle itself.
Assemble the sides to the top
With the top panel upside down, glue and clamp each side panel flush and square to it, pre-drill, and drive your 2" screws (or pocket-hole screws) through the top into each side. Let the glue set at least 30 minutes before moving on. Check that the diagonals match and the assembly sits flat without rocking.
Attach the X-cross brace
Dry-fit both brace pieces first. Glue and screw the long diagonal brace into both legs first, then glue and screw the short diagonal brace at its leg end, gluing the center point where the two braces cross for a solid joint.
Final sanding
One more pass with 220 grit over the whole piece, scraping off any dried glue squeeze-out with a chisel first, then wipe it down before finishing.
Apply your finish
For a natural look, apply two to three thin coats of clear polyurethane, sanding lightly between coats. For a stained look, apply a wood conditioner first — pine stains blotchy without it — then your stain, then a protective topcoat. Either way, let each coat dry as the finish label directs, and wait until the last coat has fully dried before putting real weight on the nightstand.
Tips
- Pick your board size based on the depth you want: a 1x6 makes a compact nightstand, a 1x8 a standard size, and a 1x10 a larger one — the same basic build works at any of the three.
- Dry-fit the X-brace before you glue anything. It's much easier to adjust the fit of two diagonal pieces before the glue sets than after.
- Use a wood conditioner before staining. Pine absorbs stain unevenly on its own and comes out blotchy without one.
- Check your diagonals at the top-and-sides stage — if they match, the nightstand is square, and everything after that goes together easier.
- Give the glue a full 24 hours and the finish its full dry time before you set a lamp or books on top — pine glue joints reach working strength fast but aren't fully cured that quickly.
FAQ
What size nightstand should I build?
It scales with the board width you choose: a 1x6 board makes a compact nightstand, a 1x8 a standard size, and a 1x10 a larger one. Pick based on the space next to your bed.
Why does the stain need a conditioner first?
Pine absorbs stain unevenly on its own, which leaves blotchy patches. A pre-stain wood conditioner evens out the absorption so the color comes out consistent.
Is the X-brace just decorative, or does it do something?
Both — it's a visible design accent, but it's also what ties the two side panels together and keeps the whole nightstand from racking side to side.
How long before I can use it?
Let the glue set at least 30 minutes before continuing the build, and give the finished piece at least 24 hours after the last glue joint, plus whatever dry time the finish label calls for, before loading it with any real weight.
Can I skip staining it?
Yes — a clear coat over bare sanded pine looks clean and modern, and it's the simplest of the three finish options.
Build it, guided every step
The Fixie iOS app turns this plan into a customized build for your exact space - pick your dimensions, get an auto-generated cut list, order materials in one tap, and follow the steps with 3D previews. Have something else in mind? Describe it or snap a photo and Fixie will design your own build from scratch - your first design is free.
Download Fixie on the App StoreMore beginner projects