Tools you'll need
- Tape measure
- Pencil
- Carpenter square
- Miter saw
- Circular saw
- Drill / driver
- Random-orbit sander
- Bar clamps - 4 minimum, 24" capacity
- Safety glasses
- Pocket-hole jig - Optional but speeds up the apron
Materials
- 5 boards, 8 ft 2x6 cedar - Top slats
- 4 boards, 8 ft 2x4 cedar - Legs and apron
- ~50 #8 × 2 1/2" exterior screws
- ~30 #8 × 1 1/4" exterior screws
- ~20 Pocket-hole screws - If using a jig for the apron
- Wood glue - Exterior / Type II minimum
- 1 quart Exterior penetrating oil - Tung oil or teak oil for cedar
- Sandpaper - 80, 120, 220 grits
Skip the math - the Fixie iOS app generates a per-project cut list for the exact dimensions you pick, with kerf accounted for and one-tap sourcing for the lumber.
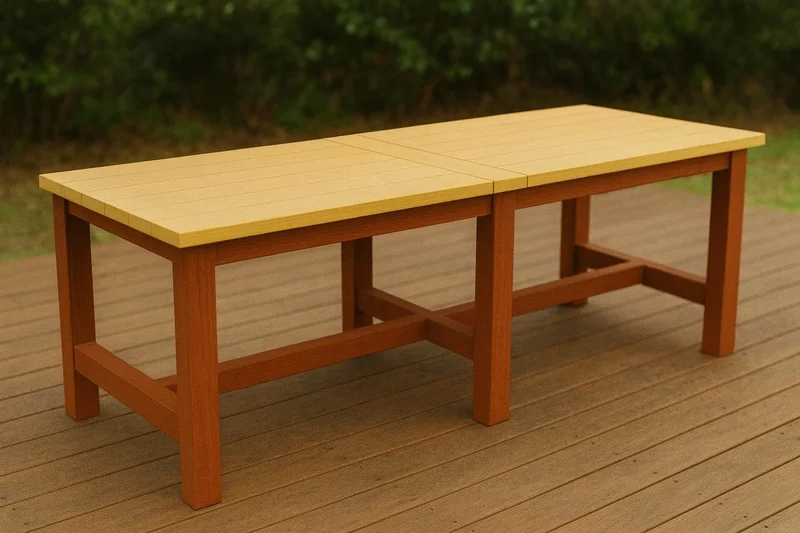
Step by step
Cut all pieces to length
Mill: four 70" 2x6 top slats, four 28" 2x4 legs, two 60" 2x4 long aprons, two 24" 2x4 short aprons. Use the cut list calculator below to verify your boards minimize waste.
Build the apron frame
Join the four apron pieces into a rectangle using pocket holes (recommended) or 2 1/2" screws driven through the long aprons into the end-grain of the short aprons. Apply glue at every joint.
Attach the legs to the apron
Clamp each leg to the inside corner of the apron, flush with the top edge. Drive two 2 1/2" screws from inside the apron into each leg. Repeat for all four corners. Square the assembly by checking the diagonals — they should match within 1/16".
Attach the top slats
Lay the four 2x6 top slats face-down on a flat surface, with 1/4" gaps between (use a paint stir stick as a spacer). Center the leg-and-apron assembly on top, upside down. Drive 1 1/4" screws up through the apron into each slat — two per slat.
Sand everything
Flip the table right-side up. Sand the top with 80 grit to flatten any high spots between slats, then 120 to clean up the marks, then 220 for a finish-ready surface. Round over all top edges with sandpaper — sharp edges chip outdoors.
Apply the finish
Wipe the entire table down with a clean cloth, then apply two coats of exterior penetrating oil. Wait 15 minutes after each coat, then wipe off the excess. Let it cure 24 hours before use.
Recoat annually
Cedar greys with sun exposure — that's normal. To keep the warm color, recoat with the same penetrating oil each spring. Two coats every two years is a reasonable maintenance rhythm.
Tips
- Pre-drill every screw hole. Cedar is soft but the ends still split if you drive cold.
- Leave 1/4" gaps between top slats so rain drains and the wood can move with humidity.
- Use exterior-grade screws (#8 ceramic or stainless) — galvanized rusts on cedar within a year.
- Build the table in the garage in spring; outdoor finishes cure best at 60–80°F with low humidity.
- Don't anchor the top to the apron rigidly. Use slotted holes or a Z-clip — wood needs to expand and contract.
FAQ
How much will an outdoor dining table cost to build?
About $100–$150 in cedar or premium pine, $40 in fasteners and finish. The same plan in pressure-treated pine runs about half that, but you sacrifice the natural rot resistance and warm color of cedar.
Can I use pressure-treated lumber?
You can, but skip the table top — the chemicals leach into food contact surfaces. Use treated lumber only for the legs and apron, then use cedar or untreated pine for the top.
Will it warp outdoors?
Cedar moves with humidity. Leaving 1/4" gaps between slats and using slotted attachment points (or a Z-clip) prevents cupping and splitting. A finish that lets wood breathe (penetrating oil, not film-forming polyurethane) helps too.
Do I need a router?
No. The plan uses no rabbet or dado joinery. A miter saw, circular saw, drill, and clamps cover it.
Build it, guided every step
The Fixie iOS app turns this plan into a customized build for your space - pick your dimensions, get an auto-generated cut list, order materials in one tap, and follow the steps with 3D previews.
Download Fixie on the App StoreMore beginner projects