Tools you'll need
- Tape measure or rule - Use one unit system throughout layout, cutting, and wall marking.
- Sharp pencil - Mark the reference end, the cut line, and every hook and wall-screw center.
- Combination or speed square - Verify the square cut line and transfer stud centerlines from the wall onto the rail face; use the level, not this square, to keep the rail level.
- Saw suitable for one crosscut - Use a circular saw with a straightedge, table saw, hand saw, or miter saw; a retailer cutting service is also acceptable.
- Drill/driver - Use a controlled clutch setting for hook-flange screws and a steady, perpendicular feed for wall screws.
- Clearance, pilot, and countersink bits - Match clearance and pilot diameters to the wall-mounting screw and to the selected hook's own screws.
- Two clamps - Steady the single rail during cutting and drilling; no glue-up needs them here, but an unsupported board still needs securing.
- Sanding block with 120- and 180-grit abrasive - Ease sharp edges before drilling and finishing.
- Safety glasses - Wear during cutting, drilling, and sanding, and while drilling into the wall.
- Hearing protection - Required whenever powered cutting or drilling tools create hazardous noise.
- Stud finder - Locate real wall studs and, if the unit supports it, check its metal/live-wire detection mode before drilling into the wall. Safety-critical for this project; not substitutable with any other tool in the kit.
- Torpedo or box level (or a phone level app) - Set the rail level against gravity when marking and mounting; a square references an edge, not gravity, and cannot substitute for this on a wall that is not itself level.
- Disposable N95 / FFP2 dust mask - Wear while sanding; it protects against wood dust only, not finish vapours.
Materials
- Planed pine board - Select one flat, straight, dry, untreated board without splits, loose knots, twist, cup, or severe wane. It supplies the entire rail.
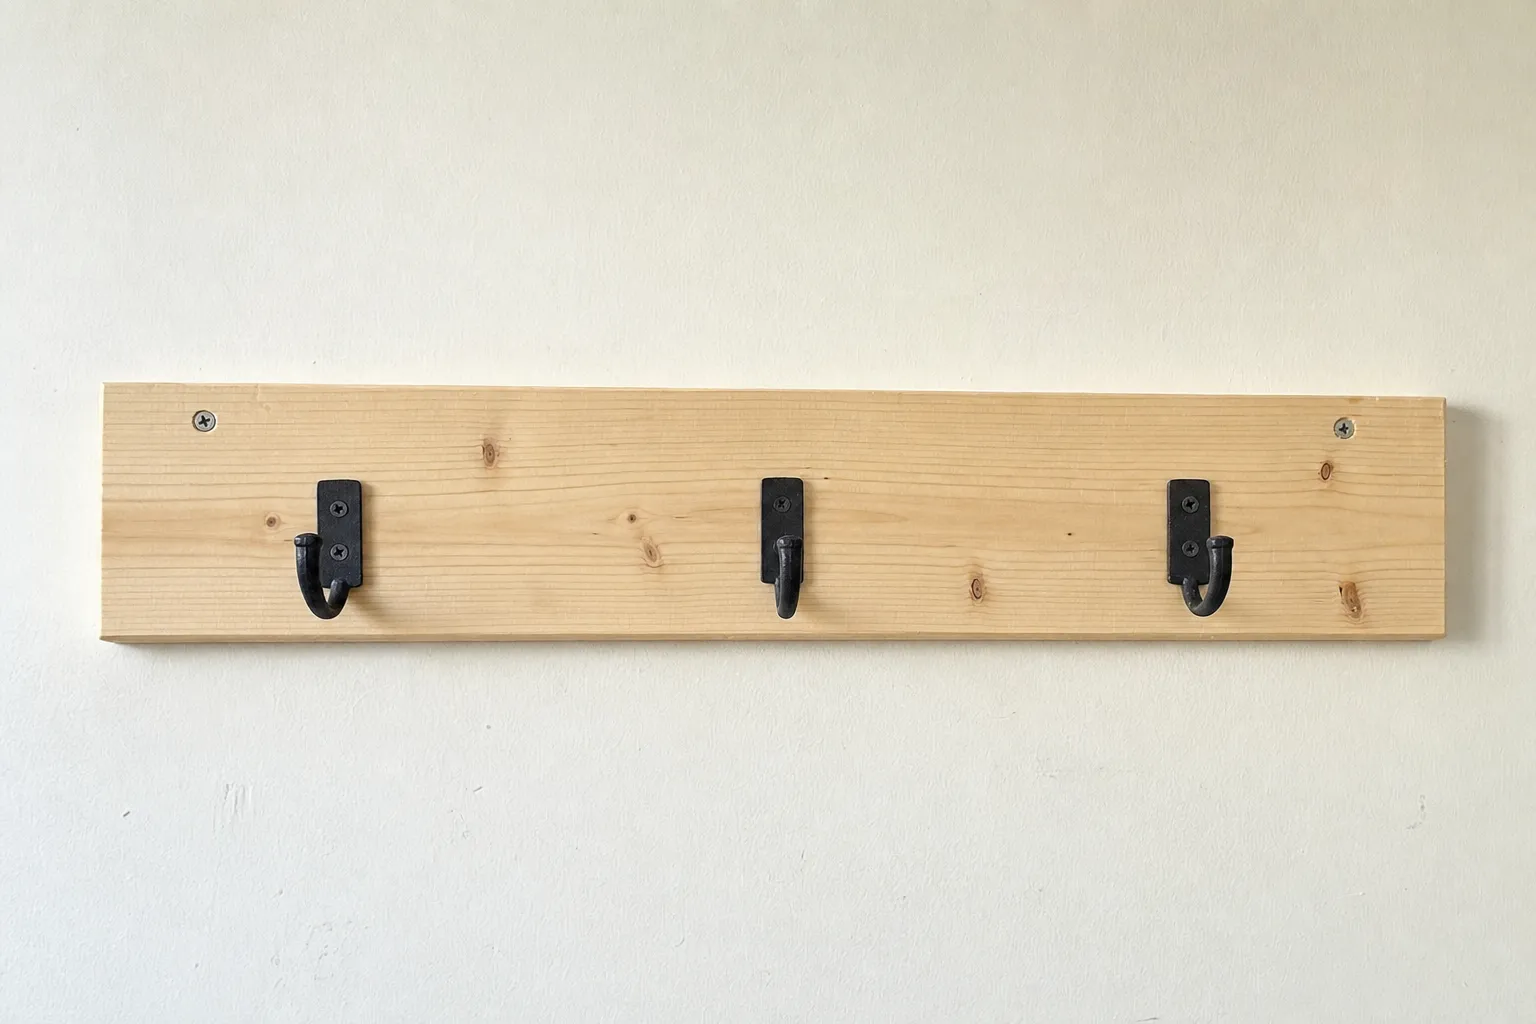
- Wall-mount coat hooks with flat screw-on flange - 2 for compact (24 in), 3 for standard (36 in), 4 for wide (48 in), spaced at a constant 12 in pitch. Choose a hook with a flat, two-or-more-screw mounting flange no more than 1.5 in (38 mm) tall, not a single long threaded screw-in shank; it must be installed using the hook itself as its own drilling template, with its lowest screw hole landing at least 1/2 in (13 mm) above the rail's bottom edge. If a chosen hook's flange does not fit that limit, raise the hook-row center until it does (see hook-layout step).
- Flat-head wood screws (wall mounting) - 2 for compact and standard tiers, 3 for wide. Use #8 x 3 in screws in the US or 5 x 75 mm screws in metric regions, sized to clear up to 1/2 in (12.7 mm) drywall or plasterboard plus at least 1 in (25 mm) of stud embedment.
- Hook mounting-flange screws - Supplied with the selected hook product, 2 per hook minimum. Typically small #4-#6 flat-head wood screws under 1 in, or M3-M3.5 under 25 mm, shipped with the selected hook. Not separately purchased; sized and counted by the hook product, not by this plan.
- Water-based clear satin wood finish - Optional. Use only an indoor wood product; follow label and SDS ventilation, PPE, coat, dry, and cure requirements. Allow full cure before installing hooks or mounting the rail.
Skip the math - the Fixie iOS app generates a per-project cut list for the exact dimensions you pick, with kerf accounted for and one-tap sourcing for the lumber.
Step by step
Plan the wall location and confirm stud access
Choose a wall location clear of doorway swings, heat sources, beds, cribs, and other child-climbable furniture. Use the stud finder to confirm the tier's required minimum stud count (2 for compact/standard 24/36 in or 600, 3 for wide 48 in) falls within the selected rail width, using the region's standard stud spacing (16 in) as a guide. Choose exactly one mounting-height rule before marking, since they cannot both be satisfied: Standard adult install places hook centers 60-65 in (1500-1650 mm) above the finished floor; Accessible install places hook centers no higher than 48 in (1220 mm), per ADA/ABA 308 reach ranges. Because the rail's top edge sits 0.75 times the board depth above the hook center (2.625 in), the chosen hook-center height converts directly to a rail-top-edge height for marking on the wall. Confirm this is not a shared/party wall without checking stud access. Do not substitute a drywall-anchor-only mounting; this design requires screws into studs.
Inspect the board and mark the length cut
Reject pressure-treated, wet, twisted, cupped, split, or badly knotted stock. Confirm the board's actual thickness and width match the plan for the selected region. Square one reference end, then mark the single crosscut at the selected rail width with an X on the waste side.
Cut the rail to length
Clamp and support the board. Square the reference end, then make the one separating crosscut at the selected rail width, keeping the blade on the waste side of the line. The plan reserves a 1/8 inch (3.175 mm) reference-end trim and a 1/8 inch separating kerf; measure the selected blade first and recalculate the stock plan if it is wider.
Sand the rail and ease edges
Sand all faces with 120 grit followed by 180 grit, working with the grain, and ease sharp edges. Re-inspect the rail for any knot or defect that lands at a planned hook or wall-screw location and re-lay-out around it before drilling.
Lay out the hook row
On the rail face, mark the hook row 0.75 times the board depth down from the top edge (2.625 in). Before drilling, check the selected hook's mounting flange: it must be no more than 1.5 in (38 mm) tall, with its lowest screw hole at least 1/2 in (13 mm) above the rail's bottom edge; if it is taller or the lowest hole would land closer than that, raise the hook-row center until the clearance is met and re-mark this row height accordingly. Space the tier's hook count (2 compact, 3 standard, 4 wide) at a constant pitch of 12 in or 300 mm, centered along the rail length so a constant 6 in margin remains at each end. Each mark is a single center reference point, not a hole pattern, because commercial hook flange spacing varies by product.
Drill the hook pilot holes
At each hook center, center one hook on the mark, then mark through the hook's own mounting-flange holes as a drilling template; the rail is only pre-marked with one center reference per hook because commercial flange hole spacing is not a sourceable generic number. Remove the hook, drill pilot holes sized to the screws it ships with (typically small #4-#6 flat-head wood screws under 1 in, or M3-M3.5 under 25 mm), set a depth stop or a tape flag so the pilot cannot break through the rail's thin back face, then set the hook aside. Do not mount it yet: the wall-mounting holes are drilled next, and the hook is only installed permanently after any optional finish has fully cured (see later steps).
Locate wall studs and transfer the wall-mounting row to the rail
At the chosen wall location, use the stud finder to locate the required minimum stud count for the selected tier (2 compact/standard, 3 wide), confirming visually and with the stud finder's metal/live-wire detection mode (if it has one) that no electrical, plumbing, or gas line runs through the marked points. Mark each stud's centerline on the wall at the intended mounting height, using the level to keep the marking line level. Hold the rail against the wall at that height, set it level with the level, then transfer each stud centerline from the wall onto the rail's face using the square, discarding any transferred line closer than 1 in (25 mm) to a rail end. On the rail, mark the wall-mounting screw center on each remaining transferred line at 0.25 times the board depth from the top edge (0.875 in). These are the marks the next step drills.
Drill the wall-mounting clearance and countersink holes
With the rail clamped on a stable bench, drill a shank-clearance hole through the rail at each wall-mounting center marked in the previous step, then countersink so the #8 x 3 in or 5 x 75 mm flat-head wood screw will finish flush.
Apply an optional clear finish
If finishing, remove all dust and apply thin coats of a compatible water-based clear satin wood finish exactly as its label directs to the bare, drilled rail; the hooks are not yet attached and both the hook pilot holes and the wall-mounting holes are already drilled, so no hardware needs to be worked around. Allow the final coat to reach full cure before mounting the hooks or the rail on the wall; otherwise skip this step and leave the sanded wood unfinished.
Mount the hooks to the rail
If a finish was applied, confirm it has fully cured. Reposition each hook at the center where it was dry-fit and pilot-drilled earlier, then drive its screws into the pre-drilled pilot holes by hand or with a driver on a light clutch setting.
Mount the rail to the wall studs
Hold the rail against the wall at the marked stud positions, start a pilot hole into the first stud, and drive that wall screw first while supporting the rail's own weight; it is unsupported until at least one screw is seated. Set the rail level with the level before driving the remaining screws, then drive them into their studs, sized long enough to clear up to 1/2 in (12.7 mm) of drywall or plasterboard plus at least 1 in (25 mm) of stud embedment.
Inspect the mounted rail and start using it
With the rail mounted, confirm every wall screw is seated in its stud and every hook is snug, then gently tug-test the rail. Hang only light coats, bags, and outerwear. Do not use the rail as a step, grab bar, or climbing aid. Stop using it and re-inspect if any hook loosens, any screw backs out, or the rail shifts, cracks, or pulls away from the wall.
Tips
- Mount into studs, not drywall anchors alone. This plan is built around stud screws and doesn't substitute a toggle-bolt-only installation.
- Pick one mounting-height rule before you mark anything: standard adult height (about 60-65 in to hook center) or an accessible height (no higher than 48 in), since the two can't both be satisfied.
- Check your chosen hook's mounting flange before drilling — it needs to be a flat, screw-on flange under 1 1/2 in tall so its lowest screw hole clears the rail's bottom edge.
- Level the rail against gravity, not against the wall — walls are rarely perfectly plumb, so use a level, not a square, for the final check.
- Finish the rail before you mount the hooks. It's much easier to coat an unobstructed board than to work a brush around installed hardware.
FAQ
Do I really need to find studs?
Yes. This plan is built around wall screws driven into studs — at least two for a compact or standard rack, three for the wide size. Drywall anchors alone aren't rated for the repeated, sometimes jerky load of coats being pulled on and off.
How high should I mount a coat rack?
Pick one rule and stick with it: standard adult height puts hook centers about 60-65 in above the floor, while an accessible install keeps hooks at 48 in or lower. Decide before you mark the wall, since the two heights need different layouts.
How many hooks do I need?
That depends on the rail width you choose: two hooks for a compact 24 in rail, three for a standard 36 in rail, four for a wide 48 in rail, spaced at a consistent 12 in pitch.
Can I use any coat hook?
Use a hook with a flat, screw-on mounting flange no taller than about 1 1/2 in, not a single threaded screw-in hook. The flange doubles as your drilling template once you've centered it on the rail.
What if my rail isn't level after mounting?
Start the first stud screw and let it support the rail's weight, then set the rail level with a torpedo level before driving the remaining screws. Fixing it after all the screws are in means starting over.
Build it, guided every step
The Fixie iOS app turns this plan into a customized build for your exact space - pick your dimensions, get an auto-generated cut list, order materials in one tap, and follow the steps with 3D previews. Have something else in mind? Describe it or snap a photo and Fixie will design your own build from scratch - your first design is free.
Download Fixie on the App StoreMore beginner projects