Tools you'll need
- Tape measure
- Pencil
- Square
- Miter saw or circular saw
- Drill / driver
- Clamps - 2 or more
- Safety glasses
- Pocket-hole jig - Optional
- Sandpaper - Optional — 80 and 120 grit
Materials
- 2x4 lumber (SPF) - Legs, rails, and runners. Quantity scales with the grid size you choose.
- 1x4 lumber - Diagonal cross-bracing — only needed if your rack is larger than 3 columns by 3 rows
- 3" exterior wood screws - The structural leg, rail, and runner joints
- Wider boards for an optional top surface - Only needed if you want a flat lid across the top of the rack
Skip the math - the Fixie iOS app generates a per-project cut list for the exact dimensions you pick, with kerf accounted for and one-tap sourcing for the lumber.
Step by step
Gather your lumber and hardware
Based on the columns and rows you choose, cut 2x4s for the legs, rails, and runners — SPF construction lumber is the standard, economical choice. Have 3" exterior wood screws on hand for every structural joint, plus a drill/driver, miter or circular saw, tape measure, square, and at least two clamps.
Cut all your pieces from the cut list
Label each piece as you cut it — leg, rail, runner, spacer — with masking tape, and batch-cut identical lengths using a stop block so every leg and every runner comes out the same. The runners run about 24 in front-to-back, sized to hold a standard tote depth.
Build your first leg pair
Stand two legs and connect them with your first runner to form an "H." Pre-drill and drive two 3" screws through each joint, on both faces of the H.
Add the remaining runners to that pair
Use short spacer blocks — offcuts from your cut list — as a gauge to keep every row spaced evenly below the first, then screw each runner in the same way.
Build the rest of your leg pairs
Repeat the H-frame process for however many leg pairs your column count needs. Center leg pairs get runners attached on both sides; the two end pairs only need runners on the inside face.
Connect every leg pair with the four long rails
Two rails run along the top, front and back, and two run along the bottom, front and back, tying every leg pair into one rigid rack. Two screws per leg keep each rail solid.
Secure the rack to the wall
Screw the top back rail into at least two wall studs with 3" screws. This is the single most important step for tip-over safety on a rack this tall — do not skip it if anyone could pull down on a loaded tote from a high row.
Add an optional top surface
If you want a lid across the top, lay boards flat across the top rails with a small gap between them, pre-drill, and screw down through each board into the rails below.
Final check and load up
Confirm every screw is tight, the rack doesn't wobble, and the runners are evenly spaced, then give the wall mount a firm tug-test before loading your totes.
Tips
- Label every piece with masking tape as you cut it — a rack with this many identical-looking 2x4s is easy to mix up.
- Batch-cut with a stop block on your saw. It's faster and keeps every leg and runner exactly the same length.
- Check the diagonal measurements on each leg pair before you move on — if they match, the frame is square.
- Screw the rack into wall studs. A tall, loaded tote rack that isn't anchored can tip forward if someone pulls down on a bin from a high row.
- Add felt pads under the legs if the rack sits on a finished garage floor you'd rather not scratch.
FAQ
What grid size should I build?
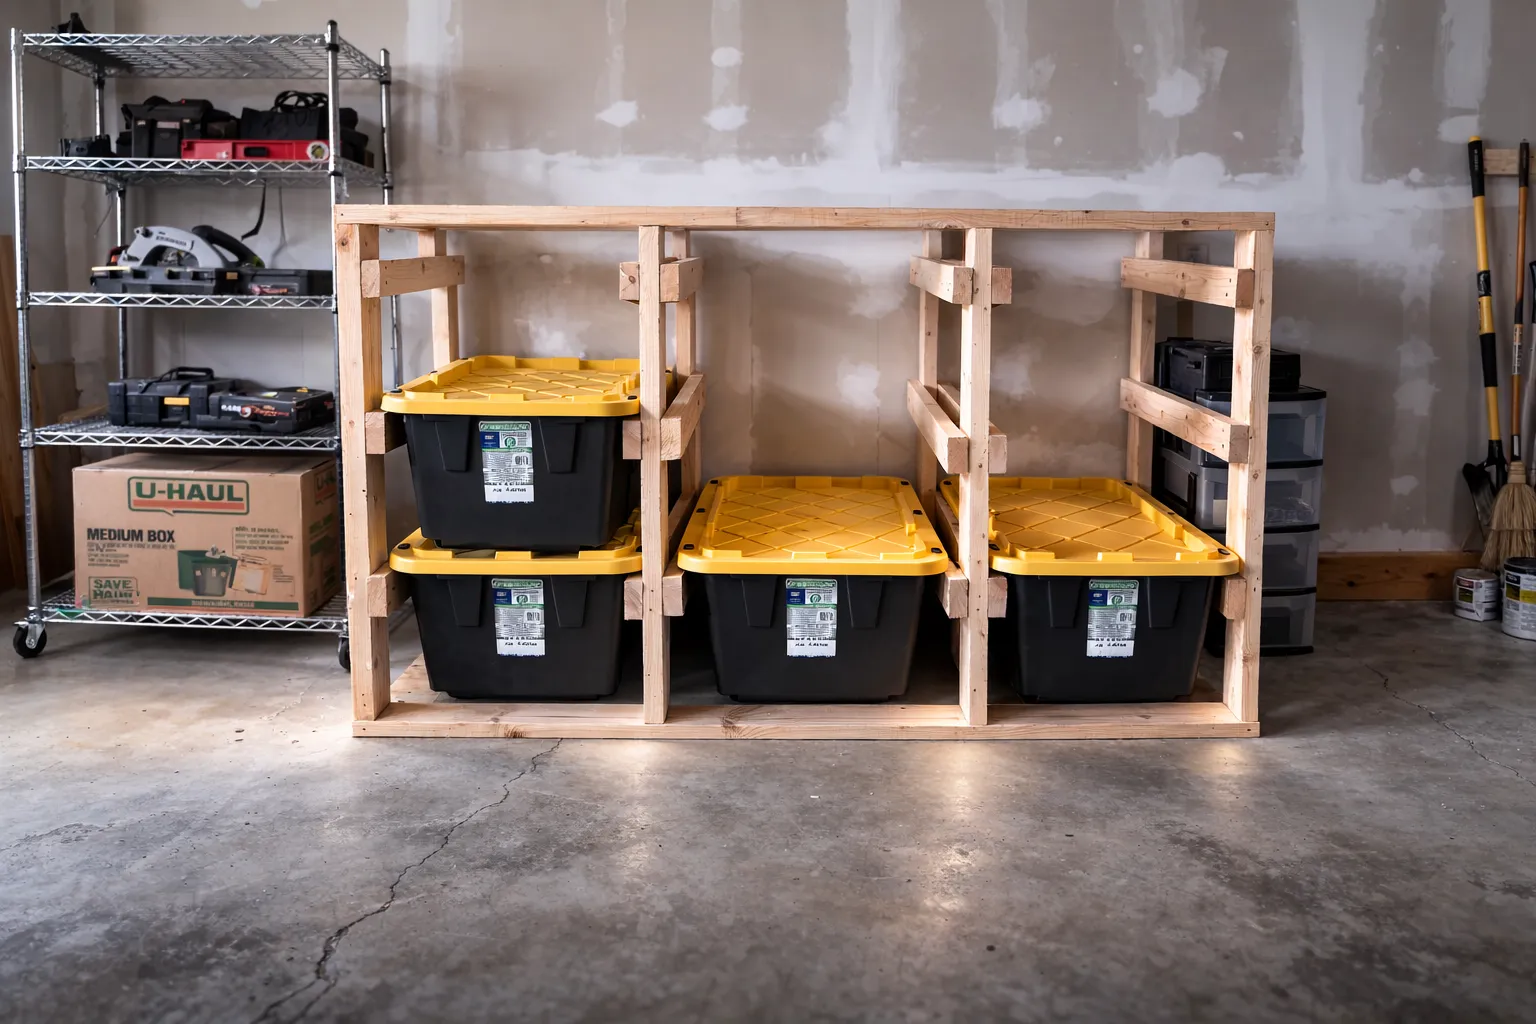
The rack scales from a small single column up to a 6-column by 6-row grid. A 3-column by 3-row rack — nine bays — is a common middle-ground size for a garage or basement wall.
What size totes does this fit?
Each bay is sized for a standard tote with about a 16 in front width and a 24 in depth, with a bit of clearance on each side so bins slide in and out easily.
Do I need the diagonal cross-bracing?
Only on larger racks — once you go past 3 columns or 3 rows, the extra bracing keeps the wider frame from racking side to side. Smaller racks are rigid enough without it.
Is a top surface necessary?
No, it's optional. Skip it if you just want open bays for totes, or add it if you want a flat surface on top for anything that isn't in a bin.
Does this rack need to be screwed to the wall?
Strongly recommended. Anchoring the top back rail into at least two wall studs keeps a tall, loaded rack from tipping forward — treat it as a required safety step, not an optional one.
Build it, guided every step
The Fixie iOS app turns this plan into a customized build for your exact space - pick your dimensions, get an auto-generated cut list, order materials in one tap, and follow the steps with 3D previews. Have something else in mind? Describe it or snap a photo and Fixie will design your own build from scratch - your first design is free.
Download Fixie on the App StoreMore beginner projects